The behavior graph editor
The behavior graph editor is where you decide what your pet does. You lay out nodes on a canvas and connect them with wires; at runtime the pet follows those wires from Start, through your actions, to End, which loops back to Start and goes again.
This page covers how to drive the editor. For what each node means, see the Node reference.
Opening the editor
Section titled “Opening the editor”- From the Library: New Pet, or Edit (pencil icon) on a custom pet.
- From the editor’s File menu: New (⌘N), Open… (⌘O), Close (⌘W).
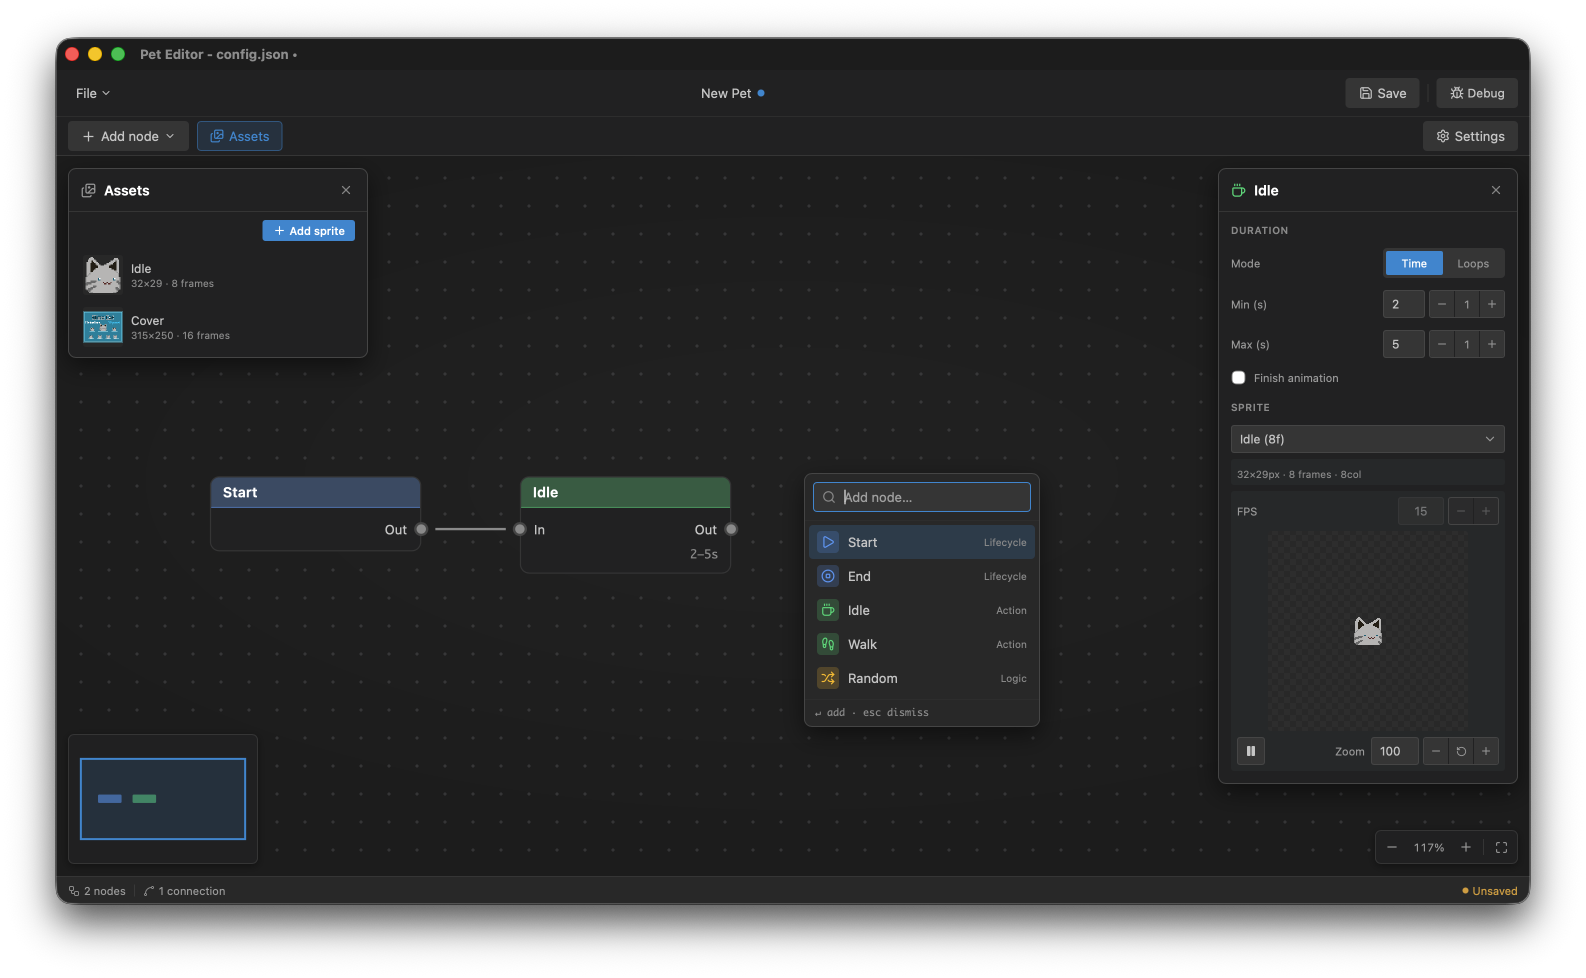
When you open a brand-new pet, the canvas starts empty with a template picker: choose one of four quick-start graphs to drop in a working behavior, or dismiss it and build from scratch.
Adding a node
Section titled “Adding a node”Three ways:
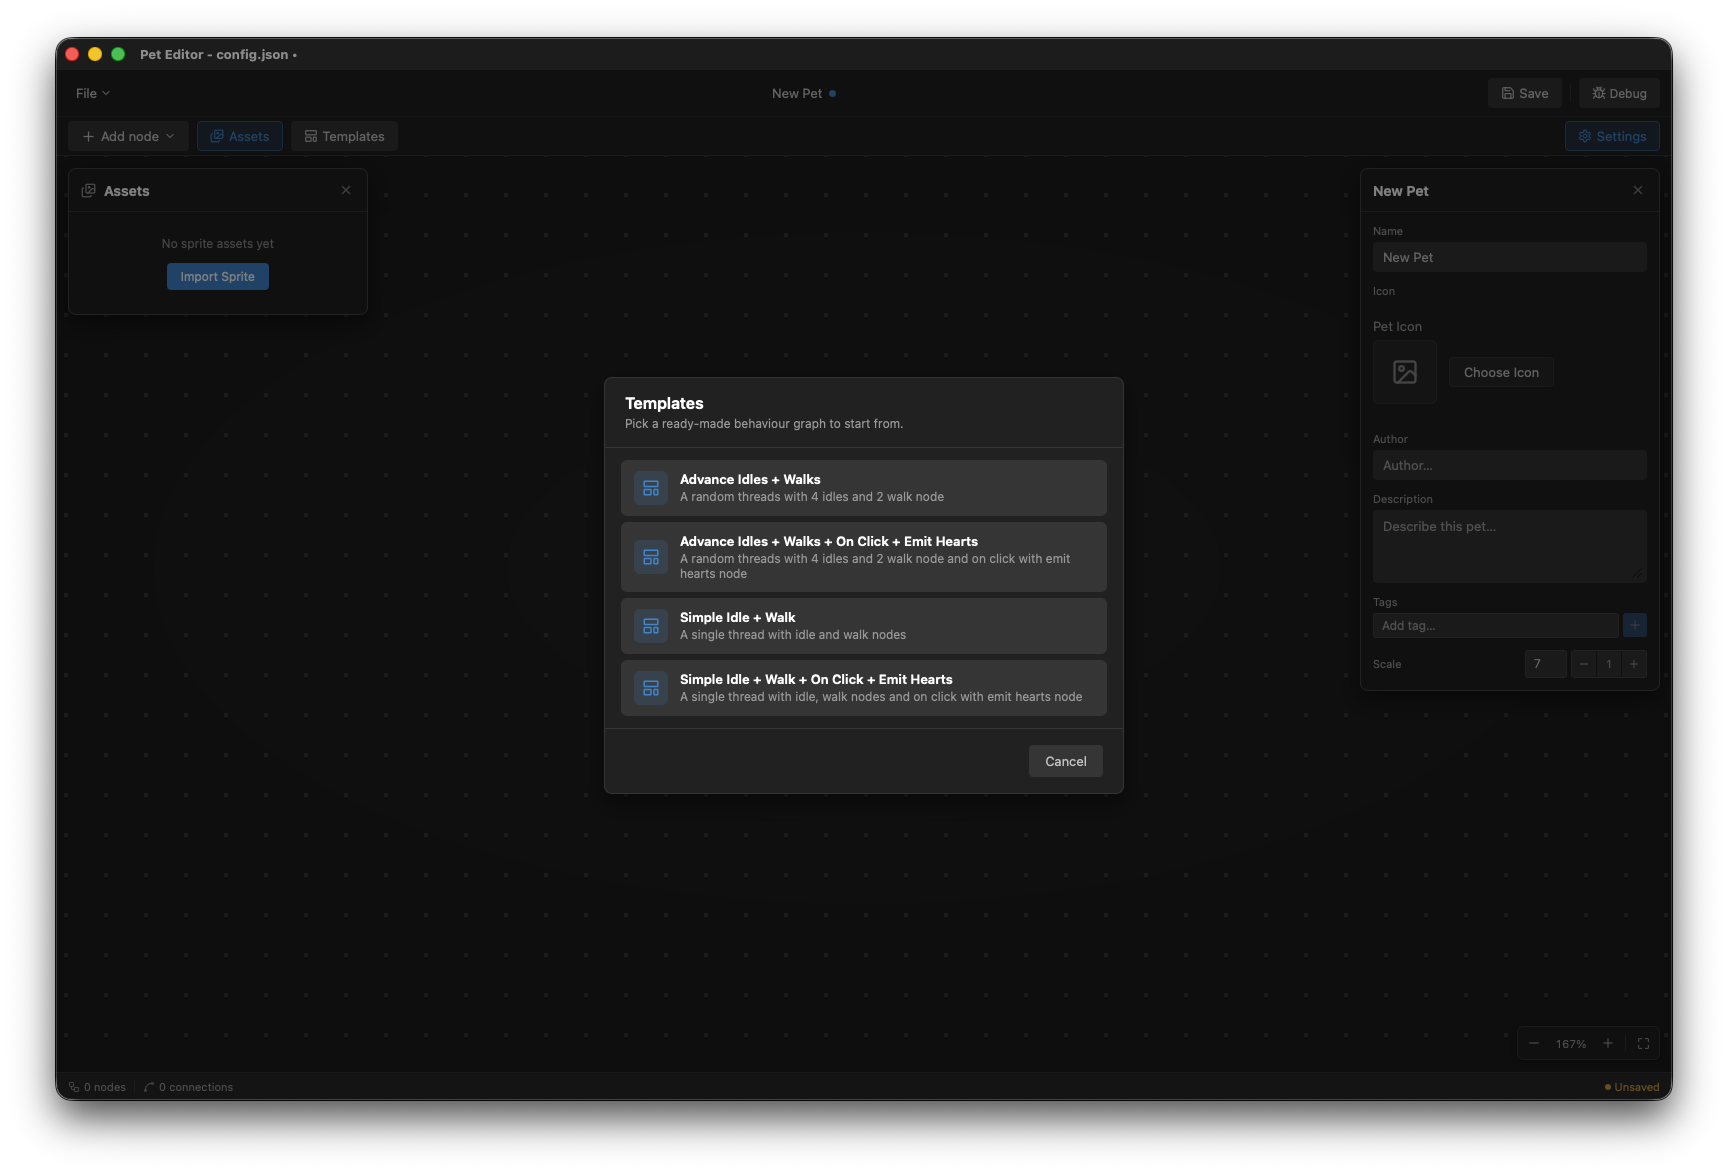
- Double-click empty canvas. A search popover opens right where you clicked. Type to filter by node or category name, use ↑ / ↓ to move, Enter to add, Esc to cancel. The node drops at your click point. (This is the fast, keyboard-friendly way.) Near a window edge the popover flips so it always stays on screen.
- Drag from an output port onto empty canvas. Let go on blank space and the same search popover opens; pick a node and it is created and auto-connected to the port you dragged from, all in one gesture.
- The “Add node” toolbar button. Opens a dropdown grouped by category: Lifecycle, Action, Logic, Event, and Effect, and drops the node at a default spot on the canvas.
Connecting nodes
Section titled “Connecting nodes”Every node has flow ports: an In on the left and one or more Out on the right. Drag from an Out port to another node’s In port to wire them.
- Ports are type-checked: you can only connect compatible (flow-to-flow) ports.
- Each output holds a single connection. Drag a new wire from an output that’s already connected and it replaces the old one. (This is how you re-route.)
To remove a connection, just draw a new one from that output, or delete one of the nodes it joins.
Editing a node: the inspector
Section titled “Editing a node: the inspector”Select a node and its editable fields appear in the floating inspector panel. What you’ll see depends on the node: action nodes (Idle/Walk) let you assign a sprite and set a duration; Start/End have nothing to edit and say so. Full details in the Node reference.
The inspector also hosts a few other views you reach from the toolbar:
- Assets. Your pet’s sprite library; this is where you open the Importer to add art.
- Sprite. Properties of a selected sprite.
- Pet. Your pet’s own settings: name, icon, author, description, tags, and overall Scale. This is where you rename a pet.
Moving around the canvas
Section titled “Moving around the canvas”- Pan. Drag an empty part of the canvas.
- Zoom. Scroll/pinch, or use the zoom pill (bottom-right): −, the percentage (click it to reset to 100%), +, and Fit to frame the whole graph. Zoom ranges from 10% to 500%.
- Snap to grid and the minimap are toggled in Settings → General.
- Select multiple nodes with a Shift-drag marquee, or ⌘/Ctrl-click to add to the selection.
Deleting
Section titled “Deleting”- Delete a node: select it and press Delete or Backspace, or right-click the node → Delete. You’ll get a confirmation. (Selecting several and deleting removes them all.)
Saving (and safety nets)
Section titled “Saving (and safety nets)”- Save with ⌘S / Ctrl+S (also in the File menu).
- The editor auto-backs-up every 30 seconds while you have unsaved changes, and warns you before you close with unsaved work.
- Validation runs when you Save or Debug (not while you type). If something’s wrong (no Start node, an action missing a sprite, an unreachable node), a Problems drawer opens, the offending nodes get a red or amber outline, and a status chip flags it. Fix the problems and save again.
Once saved, your pet shows up under Custom in the Library, ready to go Live.